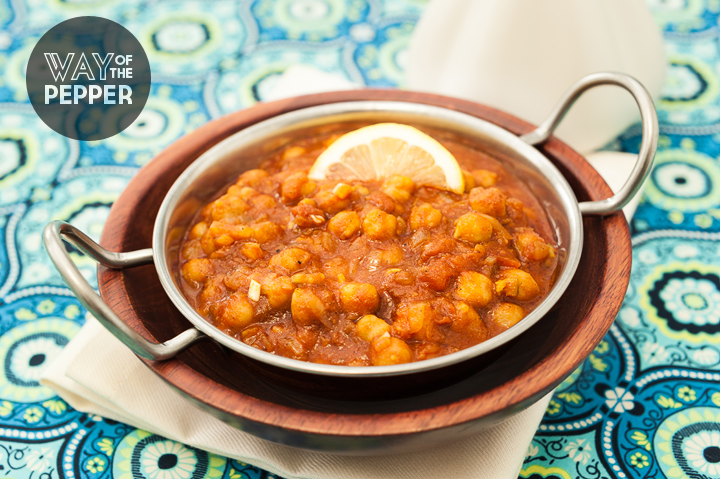
Chana Masala

Chana Masala

Chana Masala is one of my favorite dishes. When I was a child, my mother always cooked a special meal on Sundays. It was almost always either chana masala or rajma, and I was equally happy to see either one on the table. Chana masala is excellent served hot, cold, or at room temperature. It tastes spicy and velvety, with a sharp sour bite at the end.

Don’t let the long list of ingredients intimidate you. Most Indian dishes require a blend of cumin, coriander, turmeric and cayenne, and if you cook Indian food often, you’ll find it useful to make your own garam masala. For this recipe in particular, it is important to practice your mise en place, because you’ll need to add some of the ingredients in quick succession, while stirring continuously the entire time.

Ingredients

  • 2 large yellow onions, minced
  • 2½ tsp salt
  • 2 serrano peppers, minced (for less heat in the finished dish, use just one pepper, or even remove the seeds and white pith in the pepper)
  • 1 tbsp peeled and very finely grated fresh ginger
  • 4 tbsp lemon juice (avoid the stuff in bottles, it imparts an odd flavor to the dish)
  • 6 tbsp vegetable oil
  • 2 roma tomatoes, finely chopped
  • 1 tbsp ground coriander
  • 1 tbsp ground cumin
  • ½ tsp ground turmeric
  • 2 15oz cans of chickpeas (may be labelled as garbanzo beans)
  • 1¾ cups of water
  • 3 tbsp tomato paste
  • 2 tsp garam masala
  • ½ tsp cayenne pepper
  • ½ tsp tamarind paste

Method

  1. Put 2 tablespoons of the minced onions, ½ teaspoon of the salt, the serrano peppers, ginger, and lemon juice into a small bowl. Mix well and set aside.
  2. Add the oil to a heavy, wide pot and set over medium-high heat. When hot, add the remaining onions. Stir and fry for 8-10 minutes until the onion bits develop reddish-brown spots. It’s important to keep the temperature high as you fry the onions, and you should stir continuously with a rubber spatula to keep the onions moving and prevent them from burning.
  3. Add the tomatoes. Continue to stir and fry for another 5-6 minutes, mashing the tomato pieces with the back of a slotted spoon.
  4. Add the coriander, cumin, and turmeric. Stir and cook for about 30 seconds.
  5. Drain the chickpeas and add them to the pot with 1¾ cups of water, the tomato paste, the remaining 2 teaspoons of salt, the garam masala, cayenne, and tamarind paste, if using. Stir to mix and bring to a simmer.
  6. Cover, turn heat to low, and cook gently for 20 minutes. Stir a few times during this period and mash some of the chickpeas with the back of a slotted spoon.
  7. Turn off the heat and add the onions, serrano peppers, ginger, and lemon juice that you set aside earlier.
  8. Serve hot or lukewarm.

Serves 6.
Adapted from: Madhur Jaffrey’s Indian Cooking.

Bento: Lobster Ravioli

Bento: Lobster Ravioli

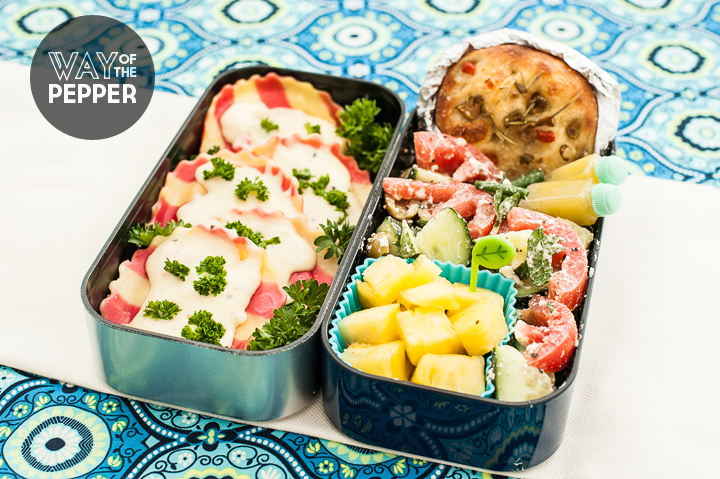
Main: Lobster ravioli with a garlic alfredo sauce.

Sides: Rosemary-olive focaccia and a cucumber, tomato, mint, and feta salad.

Fruits/Vegetables: Pineapple chunks.

I’m slowly getting the art of making perfectly bento-sized focaccia. I still had some dough left over from the last time I made focaccia, so I pulled it out of the freezer the night before, and then proofed and baked my hand-shaped mini focaccia loaves in the morning. As it turns out, I can use my pizza stone in my toaster oven and get the same results on baking as I did in my regular oven.

I purchased the lobster ravioli from costco on a whim, and was delighted to find out that it was as delicious as it looks. Served with a creamy, garlic alfredo sauce, it makes for a pretty rich meal, so I rounded it out with a light salad to cleanse the palate. The dressing for the salad is a simple olive oil and lemon juice vinaigrette, packed in a separate container to keep the salad from getting soggy. I also scooped out the insides of the tomatoes in the salad for the same reason.

Bento: Firecracker Shrimp

Bento: Firecracker Shrimp

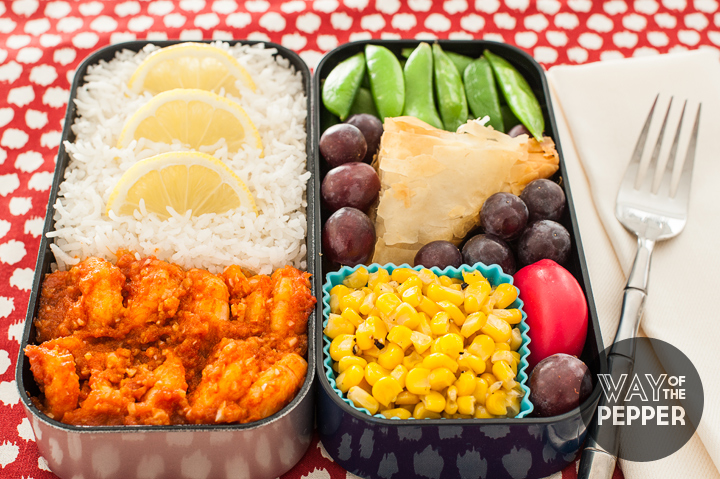
Main: Firecracker shrimp with basmati rice

Sides: Spanakopita and sweet corn

Fruits/Vegetables: Sugar snap peas and red grapes

Snacks: Babybel cheese

Firecracker shrimp are one of the easiest things to prepare from scratch in the mornings. I make a simple marinade out of equal parts olive oil and sriracha sauce, with a few cloves of finely minced garlic. Then I add the peeled, deveined shrimp and the marinade into a large ziploc bag and wait about 30 minutes. (In this case, I got the spanakopita baking and prepared the vegetables while I waited.)

Then, you can either skewer the shrimp on pre-soaked bamboo skewers and grill until the shrimp are cooked through, or simply pan fry them on the stove. I went with the stove method this morning. It’s essential to not crowd the shrimp in the pan. I let them cook, covered, for about four minutes, then flipped the shrimp and cooked another four minutes.

The best part about this is that when cooked in this fashion, the sriracha imparts a nice heat without being overwhelming. When served with fresh basmati rice, and sweet vegetables like the corn and the sugar snap peas, it makes for a very pleasing meal, rounded out with cheese and grapes for dessert.

Bento: Seven-Cheese Tortellini

Bento: Seven Cheese Tortellini

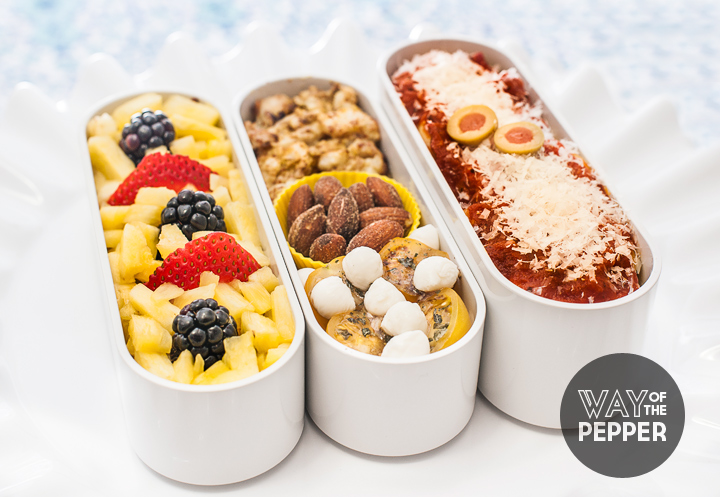
Main: Seven-cheese tortellini with a roasted red pepper sauce.

Sides: Cauliflower with mustard-lemon butter and insalata caprese made with heirloom cherry tomatoes.

Fruits/Vegetables: Pineapple chunks, sliced strawberries, and blackberries.

Snacks: Roasted almonds.

Making bentos requires constantly balancing the things that I would like to serve with the things that really need to be eaten up now before they go bad. Speaking of which, I think I’ve been overdoing it with the pineapple. This is one of those problems that you only really get when you do your produce shopping at Costco. Let that be a lesson to me.

I’m also dealing with a surplus of heirloom cherry tomatoes at the moment. I doubt that I can really use them up in bentos before they go bad, so I’m thinking about trying my hand at sun-dried tomatoes. I mean, really, how hard could it be? (Cue laughter and hijinks.)

Baked Ziti

Baked Ziti

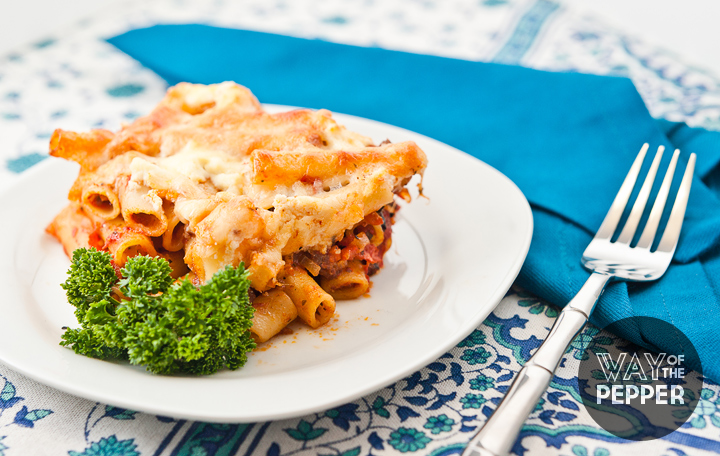
Having spent several years living in the NY/NJ area, I thought that this was one of those dishes that’s just ubiquitous to America. As it turns out, it’s not nearly that common out here in Colorado. (Or, for that matter, Mississippi, where I went to school.) In fact, I couldn’t even find ziti noodles at the grocery store. Or at the two other grocery stores I shop at. I had to order them from Amazon. Thankfully, I now have enough ziti in my pantry to make baked ziti a dozen more times before I need to reorder. (To be fair, this is just as good with penne, so if you can’t get a hold of ziti, go ahead and substitute.)

All three of us love this particular recipe for baked ziti, especially when we make the tomato sauce at home too.

Ingredients

  • 1 lb ziti pasta
  • Olive oil
  • 1 lb bulk Italian sausage
  • 1 large onion, chopped fine
  • 3-4 garlic cloves, minced
  • 1 tbsp Fresh rosemary (or basil), minced
  • 1 tbsp Italian seasoning
  • 1/2 tsp Red pepper flakes
  • 1 large jar of marinara sauce (about 32 ounces) (we make our own tomato sauce from this recipe)
  • 1/2 lb of mozzarella cheese, grated
  • 1 heaping cup of ricotta cheese
  • 1 cup grated parmesan

Method

  1. Bring a large pot of water to boil, salt generously, and add a little olive oil. (I’ve found that the olive oil keeps the water from foaming over later.) Add the pasta and boil until al dente (usually about 10 minutes, but check the instructions on your pasta). Drain in a colander and toss with a little olive oil to keep the ziti from sticking.
  2. Pour a tablespoon of olive oil into a large sauté pan and heat on medium-high heat. Once the oil is hot, add the italian sausage to brown. Use a wooden spoon to break up the chunks as you brown, but try to stir as little as possible to let the browning happen.
  3. Once the sausage has browned, add the onions and cook until they are translucent.
  4. Add the garlic, rosemary or basil, ialian seasoning, and red pepper flakes. Cook for a minute or two more.
  5. Add the marinara sauce, stir well, and bring to a simmer.
  6. Preheat the oven to 350°F.
  7. Spread a thin layer of sauce in the bottom of a 9×13 pan. Dot the sauce with half the ricotta.
  8. Toss the ziti with the rest of the sauce, and add to the 9×13 pan.
  9. Spread the pasta in an even layer and dot with the other half of the ricotta.
  10. Sprinkle the mozzarella and parmesan on top in an even layer, and put the pan into the oven.
  11. Bake for about 20 minutes until the top is nicely browned.
Serves 8.
Recipe Source: Simply Recipes’ Baked Ziti.